Complete concrete installation guide covering process, finishes, and maintenance for informed homeowner decisions.
Share:
Summary:
Understanding the concrete installation process helps you know what to expect and why each step matters for long-term durability. Professional installation involves several critical phases that determine whether your concrete lasts decades or develops problems within a few years.
The process starts with site preparation, which includes removing existing materials and properly grading the area. This foundation work is crucial because even the best concrete will crack or settle if the base isn’t prepared correctly. Next comes forming and reinforcement, where wooden forms define the shape and steel reinforcement is added to prevent cracking.
The actual pouring and finishing phase requires precise timing and expertise. Concrete transforms from a semi-liquid to solid state by the minute, making professional experience essential for achieving the right texture and strength.
Site preparation determines whether your concrete installation succeeds or fails over time. This phase involves much more than clearing grass and leveling dirt—it’s about creating a stable foundation that can handle Texas soil conditions and weather extremes.
The process begins with excavation and removal of any existing materials, vegetation, or debris that could interfere with the installation. In Texas, this often means dealing with expansive clay soil that swells when wet and shrinks during dry periods, potentially causing several inches of vertical movement beneath your concrete.
We address this challenge by ensuring proper soil compaction and installing a gravel base of 4-6 inches to support the concrete slab. This base layer distributes weight evenly and provides drainage that prevents water from pooling beneath your concrete. Without this crucial step, even perfectly mixed concrete can crack or settle unevenly as the ground shifts.
Proper grading is equally important, establishing the right slope for water drainage. A minimum slope of 1/8 inch per foot directs water away from your concrete, preventing the pooling and freeze-thaw damage that can cause expensive repairs later. The entire site preparation process can take anywhere from one to two days for residential projects, but this foundation work directly impacts your concrete’s 30+ year lifespan.
Once site preparation is complete, forming and reinforcement create the framework for your concrete installation. Wooden forms act like the borders of a sandbox, defining the exact shape and size of your finished concrete while giving us the parameters needed for proper installation.
Reinforcement is where your concrete gains its long-term strength and crack resistance. Steel rebar or wire mesh is strategically placed within the forms, typically positioned at the center of the concrete slab using blocks for proper support. This reinforcement doesn’t prevent all cracking—concrete naturally develops some cracks as it cures—but it keeps any cracks small and prevents structural failure.
The concrete pour itself requires precise timing and coordination. We use high-quality concrete mixes designed for Texas conditions, often including air-entrainment admixtures that create microscopic air bubbles throughout the concrete. These bubbles give freezing water room to expand without damaging the surface during temperature swings.
During the pour, we carefully level and smooth the concrete using specialized tools like bull floats and straight edges. The bull float pushes larger aggregate particles into the concrete while bringing finer particles to the surface, creating a smooth, workable finish. Timing is critical here—concrete must be finished while still workable but not overworked, which can weaken the surface.
The finishing process includes creating control joints, which are planned cracks that allow concrete to move naturally without developing random, unsightly cracks. For a 4-inch thick slab, we typically design control joints to create 10×10 foot sections, giving the concrete predetermined places to crack as it settles and experiences seasonal movement.
Want live answers?
Connect with a A Plus Home Remodel expert for fast, friendly support.
Your concrete doesn’t have to look like a plain gray slab. Today’s finishing options transform concrete into attractive surfaces that complement your property’s style while providing the durability and low maintenance you need.
Basic finishes include broom finish (brushed texture for slip resistance) and trowel finish (smooth surface). These standard options work well for functional areas and cost less than decorative alternatives. However, decorative finishes can significantly enhance your property’s curb appeal and value.
Decorative concrete options have grown tremendously in popularity because they offer the look of expensive materials at a fraction of the cost. Understanding these options helps you choose finishes that match your style and budget.
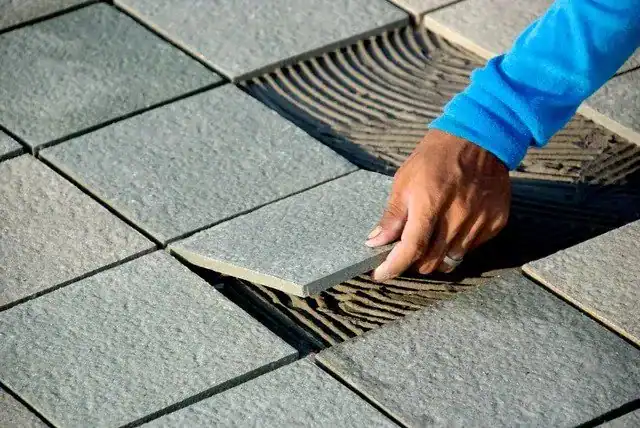
Stamped concrete replicates the appearance of natural stone, brick, slate, or other premium materials while maintaining concrete’s durability and affordability. This process involves pressing patterns into the concrete surface while it’s still workable, creating realistic textures and designs that can fool most people into thinking you’ve installed expensive natural materials.
The cost difference is substantial—stamped concrete typically runs $8-15 per square foot compared to $15-25+ per square foot for natural stone or pavers. You get the visual appeal of premium materials with concrete’s 40+ year lifespan and minimal maintenance requirements. Popular patterns include ashlar slate, cobblestone, wood plank, and various stone textures that complement different architectural styles.
Color options extend far beyond standard gray. Integral color is mixed into the concrete itself, providing consistent color throughout the slab. Color hardeners and stains can create variegated, natural-looking color effects that enhance the stamped patterns. These coloring methods resist fading better than surface-applied paints, maintaining their appearance for decades with proper sealing.
The installation process for stamped concrete requires additional expertise and time compared to basic finishes. We coordinate the concrete pour, pattern stamping, and color application while working within concrete’s limited working time. This complexity means choosing experienced contractors is even more critical for decorative concrete projects.
Maintenance for stamped concrete involves the same sealing schedule as regular concrete—every 2-3 years—but the enhanced appearance makes this investment worthwhile for high-visibility areas like front driveways, patios, and walkways.
Exposed aggregate creates beautiful, textured surfaces by revealing the decorative stones and gravel within the concrete mix. This finish provides excellent slip resistance and hides minor imperfections while creating visual interest that complements landscaping and architectural features.
The process involves removing a thin layer of surface concrete after initial setting, exposing the aggregate stones beneath. Different aggregate types create distinct appearances—river rock provides smooth, rounded textures while crushed granite offers more angular, sparkling surfaces. The aggregate color and size can be customized to match your design preferences and complement surrounding materials.
Salt finish concrete creates a subtle, stippled texture by pressing rock salt into the surface during finishing, then washing it away after curing. This technique provides slip resistance and visual interest without the cost of stamped patterns. It works particularly well for pool decks and walkways where safety and aesthetics both matter.
Acid staining creates rich, variegated color effects that penetrate into the concrete rather than sitting on the surface. These stains react chemically with concrete, creating unique, mottled appearances that can’t be replicated with surface coatings. Earth tones like terra cotta, sage green, and amber work especially well in Texas landscapes.
Polished concrete brings an upscale, contemporary look to outdoor spaces. Multiple grinding and polishing steps create increasingly smooth surfaces that reflect light and resist staining. While more common indoors, polished concrete works well for modern patio designs and areas where easy cleaning is a priority.
Each specialty finish requires specific expertise and equipment, making contractor selection crucial for achieving professional results that last.
Proper maintenance extends your concrete’s lifespan from good to exceptional, protecting your investment against Texas weather and daily wear. The key is understanding that small, consistent care prevents major problems and expensive repairs down the road.
Regular cleaning and sealing form the foundation of concrete maintenance. Most concrete surfaces need thorough cleaning at least once yearly, with sealing every 2-3 years depending on exposure and traffic. This proactive approach keeps your concrete looking great while preventing moisture penetration that can cause cracking and deterioration.
Understanding what your concrete needs—and when—helps you maintain its appearance and structural integrity for decades. With proper care, your concrete installation can easily last 30+ years while continuing to enhance your property value. At A Plus Home Remodel, we combine decades of experience with proven techniques that deliver lasting results for Tarrant County homeowners.
Article details:
Share:
Continue learning: